December 30, 2011

Burda Handbook Blouse Novita's version


My sister-in-law got me Burda Style Handbook.
I was so happy!!!

Now I'm going tracing crazy...
I finished the muslin (tracing paper version) of 12/2011 dress 102, and since I don't have the fabric yet (I wanted to get Liberty fabric!), I decided to trace the blouse from Burda Style Handbook, Novita's version.
Few thoughts before I start to stitch this muslin paper...

You need to Trace patterns 1,2,3,4,5 and 7.
They mention that 3,4 don't need any alteration, and describes (with picture...nice!) how to alter 1,2 and 5, but nothing on 7.
7 is the front facing. I just traced as is.

Also from the technical drawing, I thought there was a back facing, but I guess it's just 2 pieces of back yoke.

The thing about this version is, although they show a clear alteration to this version, the added length/width is all the same for all sizes.
Just looking at the pieces, they all look pretty big, as I cut out size 37 (between 36 and 38) and added the same length/width as the biggest size, which is 46.
We'll see how it looks as I sew them.

1/1/2012 Happy new year!!

Update on this top...
I just love the new tracing paper...
I stitched them together and tried it on.
I did so many alterations and tried it on so many times, but the paper withstood all the handling.
Better yet, it just got softer like a fabric.

Anyways, on the pattern.
I just love Burda patterns... It just seem to fit me just right at the suggested size.

But as I suspected, all the flares looked too much.
I think it would be ok if the fabric is drapey (I think they used silk?) but I was planning to use linen blend, and I didn't know if it would drape that well.
So I took about 1cm off all the flares that was added to the patterns.

Also, i noticed that no matter what I make, my back always seem loose.
So i took in about 1cm from the center seams (total of 2cm) and also took in the side seams for 1cm only from the back pieces.

The finished muslin paperlooks really cute.
Tomorrow, I'll be cutting into the actual fabric!

1/4/2011
I finished the top, and love it! :)
Good thing I did a muslin fit, the altered back fit me perfect.
It fits me just right, and it's comfortable!
I didn't add the sleeves. I didn't think it would look right on me since I have broad shoulders.

Few things though, the armholes are kinda big...
I didn't notice it when I was making the muslin.
It might be perfect for layering, but it shows my bra if I don't wear anything underneath. :(
Another thing is, although it's a really cute design, because it flares toward the bottom, it might emphasize the hip if you have a bigger bottom.
Because of this reason it's hard to style the bottom with this top.
I don't think you should wear anything baggy to go with this, but it didn't look right with leggings either. :(
The best thing was short sgorts, but I tend to get cold and cramps if I wear anything too short for too long. :(
Hmmmm.....

If I was to make this again, I think I would lengthen the bottom and make a dress. :)

December 29, 2011

Swedish tracing paper

I just got my Swedish tracing paper and tried it out for the first time.
I used it to trace Burda 12/2011 dress #102.

Someone said that it's just an interfacing... And yup, that's what it felt like.
But it can see through fairly well, in fact as much as the gift wrapping tissue paper I was using.
The part I liked about it is that it's rolled, not folded so the tracing process went very smooth.

I made some errors without thinking through...
Here're some lessons learned:

1.when the pattern has a "fold", make sure you trace the other side also, not just the half.
The front and back bodice pattern was folded in half, and after I finished tracing both and started cutting, I realized...
"Wait, since I'm gonna sew this up and make it a muslin, I need to have all the bodice, not just half."
So i had to trace it over.

2. Make sure to add seam allowance to the tracing paper as well.
I'm so used to just cutting the pattern as is, then add the seam allowance when I cut the actual fabric...
But since I'm sewing this one, I need to add them to it.

So I cut the pieces and sewn only the side seams.
I taped up the front/back facings to the bodice, and also taped the shoulder seam.
Well, facing was fine, but I would recommend sewing the shoulder seam also...
When I tried it on, the tape on the shoulder seam came off.

Overall, it was really cool using this tracing paper.

Now onto the dress #102.
I've made about 3 garments from Burda magazine so far, and I'm just impressed with the fit.
Except for the pants, the tops fit me perfectly.
This dress was no exception.
I used this tracing paper as a muslin, but didn't need to do any adjustment.
It seemed to fit me perfectly.
The only thing is, because it's just a paper (although it acts like fabric) it doesn't really have any drape to it.
This dress was an A-line skirt, which I thought was a little widw at the bottom, but I didn't adjust anything because it might drape very differently with more drapey fabric.

The funny thing is, Burda pattns are for women size 5'6".
I'm 4'11", but the tops fit me perfect everytime (except shortening the hem, but I don't need to adjust any bodice).
I must have a really long torso and short legs...

December 28, 2011

Burda magazine 8/2011 Jacket 117

Jacket 117 from Burda magazine 8/2011.
With this lightweight Jersey crepe, it's more like a cardigan than a jacket.

Just by looking at the size, I thought I need an adjustment on the bodice length, since I'm 4'11'.
I tissue fitted, and it didn't look too bad, so I just cut it as is, with size in between 36-38.

This was an easy pattern.
I think i took longer tracing and cutting the fabric than actually sewing it.
Well, but that's just sewing, without any adjustment.

First I sewn in about 1/2in off the seam as it looked too big.
Then I cut the sleeves off about 3 inches, making it 3/4 sleeve.
I thought it looks kinda too heavy to have a black cardigan with full flounce.
Wait, I had to shorten my sleeves about 4 inches to begin with when I cut the fabric, so I actually cut about total of about 7 inches.

This lightweight jersey had more drape than I thought, so yup, the cardigan looks droopy (first triangular flounce comes around my waist) and long (down to my butt)
I don't really know how to do raglan sleeve adjustment, so I think I'm just going to cut some width off (about 2 inches) and and hopefully it will keep the same flounce effect.
And I'm also cutting the hem to my hip line.
We'll see how it turns out...

December 22, 2011

Sewable tracing paper!?

I was looking through the message board on www.sewing.patternreview.com, and found out that there's such thing as a sewable tracing paper.
You trace the pattn sew it like a muslin, make any necessary fitting adjustment, and then cut the fabric using this adjusted traced pattern.
WHOOOA, I NEED TO HAVE THIS!!!
I found it on ebay for $13 including shipping... Which is pricey compared to the gift wrap tissue paper that I'm using, but if you think that you don't need to buy any muslin fabric... It's a great buy.
I admit, I'm too lazy to make muslins, but after every project I wish I did...
once I finish, I need to make so many adjustment.
Especially now that use Burda patterns. It's made for tall people (well, people who are alot taller than me), and i seem to need to shorten everything.
It would be great to use a traced paper as a muslin.

I was thinking about getting some Liberty of London fabric... I found out that you can get them much cheaper through UK ebay.
I was excited to finally get my hands on Liberty, but was dreading that my finished garment wouldn't fit right...
i was thinking about making a muslin, so this tracing paper would be perfect!

December 20, 2011

Mesh border fabric

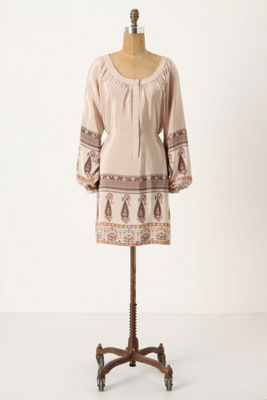
During the after Thanksgiving sale, I got this mesh fabric with borders.
I was trying to figure out what to make with this, and found this dress on Anthropologie.


So cute!!! My fabric look exactly the same... Hopefully I can make a dress like this.

December 19, 2011

Burda 7/2011 #114 top

Now I'm working on Burda magazine 7/2011 #114 top.
I thought it was really cute... Light weight jersey, casual but it's a wrap front so still has a little something, rather than just a T-shirt.

Now I have made two garments from Burda magazine, I'm pretty impressed with the fit.
With my silk chiffon top (still need to blog about it...), I made no fitting adjustment but it fit me perfectly.
But it was a pretty roomy style anyways.
This shirt is more fitting, but yet it still fits me perfectly. (so far)
The only thing with this top is that the front inside neck is to low. :(
i had a feeling, Since the picture seemed to have a low neck.
I should've checked it with tissue fitting.
Now I need to shorten the shoulder seam of this piece only, so it'll have a shorter hem.
At least it'll be covered by the top wrap pieces...

December 9, 2011

Burda 6/2011 #114


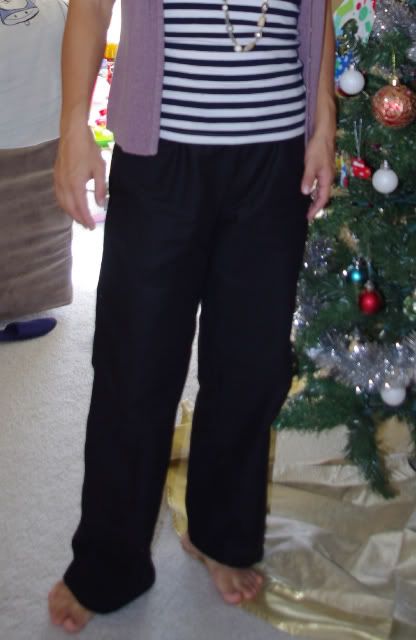
I made a pants from Burda magazine (7/2011, #114).
i own probably more than 20 pairs of pants, but none of them really fit.
I'm petite, with small hip but thanks to giving birth to two kids, and being lazy not doing much ab workout, my waist is unproportionally bigger.
So when i saw this pattern i thought it was a perfect project.
It has an elastic waist, but the pants still looks classy and even has pockets.
I thought "how hard can it be? Just make the suggested size, and it should be perfect."
Boy was i wrong.

Just to keep it short, these are what I did.
According to the sizing chart, I am size 36 hip and 40 waist. So...

1. Made 40 waist, 36 hip and below. Too big.
2. Made 38 waist, 34 hip and below. A little better but still too big. However 34 is the smallest on the pattern.
3. Took about 1cm overall. Fit bettr but crotch too long?
4. Cut crotch about 1cm at the waist. Better. Butt fits almost perfect, but baggy in the back.
5. Took 1cm on back side seam only bellow the butt. Much better. But something is off... My mom noticed that the front waist-mid thigh is too big.
6. Took 1cm on front side seam only, between the waist (below waistband) and mid-thigh.

Result? perrrrrrrfect!!!!! :)
Because it's an elastic waist, it's so comfortable. But because of the nice micro brushed twill, it still has a little officey classy look to it.
I love it, but if I was to make another pair of pants with this pattern, I'll probably use more drapey fabric.
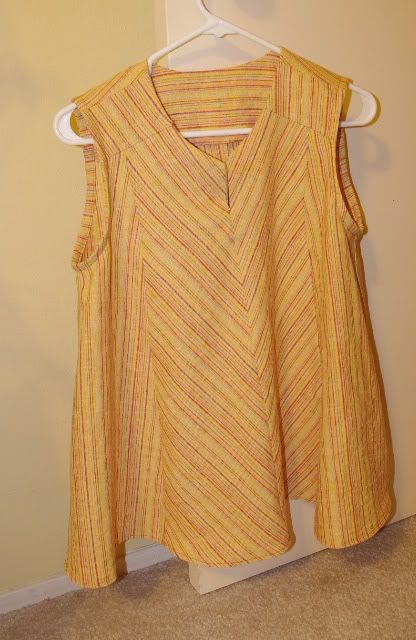
I'm thinking about using a striped linen....

December 1, 2011

Shorts

While I wait for my Burda magazine, I need some projects!
I made shone pj for my son, shorten his long sleeve shirts to short sleeves...
Hmm... What else can I do?

I was going through all the fabric stash and came across the Kona cotton blue fabric I used for Simplicity 2444.
maybe it's enough material for shorts...
I've never made any shorts or pants with belt loops or hooks yet... This will be a good challenging project!

BTW this is the pattern I'll be using...
From Ruriko Yamada pattern book (Everyday wardrobe?).

Oops I can't upload a picture from my IPad. That sucks. :(

November 30, 2011

Media mail?

In the past few weeks, I bought a total of 4 Burda magazines, and it seems like they were all sent by Media Mail.
The first one was shipped on Nov 14, and still hasn't arrived as of Nov 30. :(
It's supposed to arrive within 2-9 days...
I bought few fabrics to make something from the magazines last week, and they have arrived already.
I know it's more expensive but I should've asked to send them by Priority mail. :(

November 25, 2011

Riley Blake flannel $3.99 including shipping

I made a whole bunch of flannel pjs using Riley Blake Indian Summer fabric, and had so much left over..
It wasn't enough for another garment so I cut them up into 6x6in pieces.
I have 24 creme and 24 brown, also 19x20in and 20x20in pieces in brown.
I listed them for $3.99 on EBay including shipping within U.S.
If interested please check it out...
http://www.ebay.com/itm/190606313037?ssPageName=STRK:MESELX:IT&_trksid=p3984.m1555.l2649#ht_500wt_922

Ok, revised...
3hrs after I posted on EBay, it was sold!
I'm glad I didn't just throw it away!

November 21, 2011

De-clutter

Feels good to de-clutter...
While I wait for my Burda magazines and fabrics, I'm going through what I have to do something in the mean time.
I finally decided to clear out my fabric scraps.
Not even stash.. Scraps. I couldn't believe why I was keeping some of them, that was like 1in x 3in.
In threw out the really small pieces, and kept some to donate...

Then I have this pretty big size scrap of flannel I used to make x'mas gift pjs.
I cut out one more child's pattern, and for the rest, I cut out 6x6in pieces.
I got a pretty good number of these square pieces now.
I thought about quilting...
But I'm not really into quilting, and flannel is too hot here in Hawaii anyways.
I'll try to sell them first, and if it doesn't sell, i'l probably give them away...
At least my stash looks more organized!

November 15, 2011

Few things I learned...

Few things I learned on sewing.

1. PRESS.

I took few hours of sewing lessons from this lady advertising on craigslist.
The lady was really nice, but there's one thing that I wish she never taught me.
She told me that I can "finger press" as I make my garment.
That was few years ago, and now I know how important pressing is when it comes to making it a nice finish (although I HATE pressing!).
I wish she never taught me this, considering I was a beginner.

2. Use a pattern!
I now admit that I'm a beginner. Stop trying to make your own pattern. It does not work.
Use a commercial pattern and modify if necessary, and it'll produce so much better results!

Recon


Do you finish what you started?


When it comes to sewing... me? No.


I was going to make another Simplicity 6648, but after I cut the fabric and sewed the shoulder seams, I already didn't like how it looks so I completely lost the motivation to continue.


So I decided to do some recon that I've been holding off.


I had these long sleeve polyester shirts for awhile.


I really like them and used to wear it alot when I was working, because there was AC at my work.


But now I'm home and it's HOOOOOT, these tops were just sitting in my closet.
So I decided to chop the sleeves off.


I wish I took the before pictures, but I didn't. :(


At first I was going to make both of them sleeveless.


But when I cut the sleeves off the grey top with a little seam allowance, it just looked cute to have a little puff sleeves, so I decided to cut out a puff sleeves off the long sleeves.


I used one of my Japanese pattern books for the puff sleeve pattern.


Although it's a little uneven (my hubby said he can't really tell), it turned out really cute!!!!


I'm so gonna be wearing this more often.


With the white/brown top, I'm just gonna make it a sleeveless as planned.


The design is so big that a cute sleeve won't show too well.


I'm thinking about using the cut sleeves to make a fabric flower and attach it to the neck facing.


Here's the result...
It's soooo much better!!!
I didn't make the flower, I wasn't patient enough. :p

I'd be wearing these more often!

It was a nice recon day.


Whenever I try a recon, it normally turns out a disaster.


Is it that my sewing skill is getting better?


Ha.

Simplicity 2444 with matching daughter dress


I finished Simplicity 2444 and a matching dress for my daughter's birthday party.


Ok, which one is better... to be a good photographer, or to have a good photographer as a husband?

In our case, I'm the photographer and my husband really SUCKS at taking pictures!!!

I asked him to take a picture with my daughter and me wearing the dresses, and although he took so many pictures, they were all focused on the background trees, and none of the pictures showed the full dress. :(


Anyways, I'll be writing a review on www.sewingpatterns.review.com for Simplicity 2444.


I used Japanese pattern book for my daughter's dress.

It turned out a little too big though.

My daugher wears 18-24 months (she's 11 months!) so I made 90cm (my almost 3 year old wears 90cm) and yup it was too big.

But I knew 80cm would've been too small.

I thought about making it over but my husband suggested we can ust put a cardigan on top and it won't look too bad.


This book has really been useful.

I've made few dresses for my daughter & pants for my son.

Maybe I should write a review...


November 14, 2011

Burda Magazine

I finally discovered Burda Magazine.
Well, I've been to Burda websites many times before, and I knew there was a magazine from them.
I had this snobby "I'm sure those sewing magazines are not trendy enough for me" attitude toward any sewing magazines without even looking at it at all.

I was looking into buying another Japanese sewing pattern books because my mom is coming to visit and she can bring them. (Free shipping! Ha.)
But I really didn't like those Japanese style fashions...
They just look so baggy and no shape at all.
So I thought I might be better off finding something from here.
I don't remember how I got to discover Burda magazines, but I was in a pleasent shock when I first saw it.
It's like Lucky magazine that I subscribe, but you can sew them all!!
How cool is that!!!!

At first I thought about subscribing, but since it's November and all they have is winter stuff, I didn't think I'd find anything that's usueful here in Hawaii.
So I ordered a June 2011 issue on ebay for now, just to try it out.
I'll probably subscribe for 3-6 months starting spring time.
I'm so excited to receive it in the mail!!!

Simplicity 6648


I originally wanted to make another beach coverup with this fabric, but it just turned out to be a disaster...


The fabric just did not go with it.


Plus I've sewn (serged...even worse) the front & back wrong, so I was just not motivated to finish it.


I just wanted to turn it into something else...


I always wanted to try Simplicity 6648, and I thought this was the good time to use the fabric to make View D, as it didn't seem to use that much fabric.


Turned out... I LOVE IT!


It was so easy - I didn't have enough fabric to make the full waist band, but it still turned out pretty good.


It's another cowl neck top, but it was even easier than the McCall version.

I actually finished it in one day. I cut the fabric while my husband watches the kids, and sewed it while they're taking a nap, and it was done!

The only thing with it is that the neck is a little low and armholes were a little too big... I might need to try size 10 around the shoulder area.


I have another jersey fabric, so I want to try the View A with it.

November 8, 2011

Too many projects as usual, but productive today!

I have a bad habbit of starting a new project before finishing the other.
I guess I get bored in the middle (for example, I'm getting bored of making so many PJ pants for x'mas gifts... it's just same pattern over and over), or if I bump into an obstacle (not having a supply, etc), or when it's almost done, I just start another project.

Well, tonight was very productive.
I actually finished 3 projects.
They were all "almost done" garments...

First of all, I still need to blog about another Simplicity 2444 dress that I made to wear to my daughter's 1st birthday party.
(...well, this one is actually not done yet... I still need to hem...)
Today, I finished a matching dress for my daughter.
I started it few days ago, and I finally finished it by doing some hand stitching the shoulder and hemming the bottom.
I need to take a picture of me & my daughter wearing it so I can put it up on www.sewing.patternsreview.com.

Then I finished a PJ pants for my son, and another PJ pants for my friends x'mas gifts.
They were both almost done. They just needed to have a waist elastic and hem the bottom.

I feel so accomplished!!!

October 30, 2011

Simplicity 2444


We decided to have our daughter's first birthday at Waioli Tea Room in Manoa.
It's based on pink theme with fire place and old piano and everything.
It's so cute, that I was really happy to find it.

I decided to make it a tea party theme - and thought about making a matching dress for myself and my daughter in blue, sorta like Alice in Woderland.
(My hubby wanted to wear a hat like a mad hatter...)
I picked Simplicity 2444.

I ordered Valori Wells Wrenly Voile Wildfield Cobalt

and use Kona Cotton Ocean as a ribbon.


I don't usually buy fabrics over $10/yd.
When I do, I like to make a muslin so I have a perfect fitting and don't waste the precious fabric.

So for this pattern, I decided to make a wearable muslin using plum satin polyester fabric that I had in my stash.
Everything is pretty good, except the waist was too tight.
My sizing should've been 12-18-12, but since this pattern was available only in 6-12 or 12-21, I didn't have the pattern to extend the waist to 18.
I figured I'll just make 12 and see how it goes.

It turned out that the sizing wasn't that bad.
It was just a little snug around the waist, but it's not like I couldn't zip it up or anything.
So I think I'm just gonna expand the waist by 1/2 inch or so next time.

As for this wearable plum muslin...
It turned out really nice, but with this material (too hot for Hawaii!) and style, I would probably never wear it.
The only time I might wear it is for someone's wedding, but I don't know of any wedding coming up.
And if I do go to a wedding, I'll probably make another dress!

I seriously thought about giving it away on this blog.
But my cousin so happened to be visiting from Japan, and she was a perfect fit for this dress.
We had a pretty much same size, except her waist was a lot slimmer. :p
I asked her if she wants the dress, and she said yes so I decided to give it to her.

October 25, 2011

Simplicity 2892 Review


This is a dress I made using Simplicity 2892 long time ago... Maybe about 2 years ago, before I was pregnant with my second one.
It's a pattern for tops, but lengthened the bottom to make it a dress.
I don't remember the small details, but I just remember how this pattern just doesn't have much shape.
From the bust, it just goes straight down.
And probably because it doesn't have any darts or anything, there's a little "pouch" around the belly.
I took in few cm around the waist to get a shape, but it still didn't fix the pouch problem, and I'm not good enough to draft my own darts.
It just looks like I'm pregnant in my first trimester. LOL.
So the only solution was to have a belt or a sash.

I think it's the fabric that made this dress though.
I got it from a seller from etsy, I think it was called Fabricana, from India.
I just love their paisley.

I did line this dress with another cotton, since the fabric is thin white cotton, and you can just see through the dress.

If you look at the picture really close, you can actually see how this dress is still not finished... I haven't hemed!! Haha
I like the red border at the end, and since it'll disappear if I try to hem it, so I left it alone... and I was just too lazy to hem the inside liner, so you can kinda see it peeking.

Would I make it again? Maybe.
It's a simple pattern that will probably give lots of different looks depending on a fabric you use.
But I wish I knew how to fix the pouch problem.

October 22, 2011

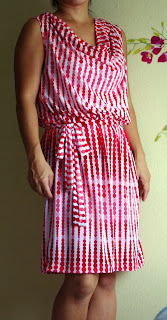
McCall 6069


Recently I watched a Japanese TV show recommended by my mom.
It's about a 30-year-old mom, who's too busy to dress up, decides to become a model after being turned down by her husband.
It was actually a sad show (to me) because they ended up getting a divorce for her to pursue her modeling career.
But watching this TV show kinda motivated me to fix up a bit...
I've been too comfortable wearing baggy clothes. (Even though they're pretty maxi dress, it's just too casual looking)

I had this knit jersey fabric that I bought from www.fabric.com when it was on sale for about $3/yd.
I was planning to make another comfy shirt with it, but decided to make it into a nice dress, and picked McCall 6069.
(It's been awhile since I actually bought a pattern!)

This was a pretty easy pattern, considering how trendy it is.
I love the cowl neck.
Few things I didn't really like were how low the neck is, and the elastic band.
The neck is so low that I need to wear a tanktop underneath.
If you bend down a little bit, you can see down the shirt.
Living in Hawaii and it's so hot, I don't really like layering too much.
And the elastic...
I didn't read the instruction really well, so I probably didn't do it right.
It just don't feel right.

Anyways I still like this style. It makes me want to straighten my back and walk like a model. Haha.
I have another knit, I'm planning to make another one, but this time as a top (since I don't have enough yardage) without an elastic.

October 18, 2011

Simplicity 3935 Pajama pants


After seeing some posts on www.sewing.patternreview.com, I decided to make pajama pants for some people for x'mas.
I found Simplicity 3935, and thought it's a deal since it includes the pattern for both adults & kids. (and I got it on ebay for $6.99!)

I started off with making size M in adults for my sister-in-law.
The fabric is flannel, Indian Summer in creme from www.fabric.com.
She's size M but around the same height as myself (4'11"), so I used my own PJ pants to estimate to shorten crotch/length.
For some reason, this crotch seems to be so long!!!
I looked at my PJ pants, and I guess all PJs are like that...
You wear it like a long-john (goes below-bust?) but as you wear it, it just falls to your waist for comfort.

This is such an easy pattern - other than the crotch, everything is just straight.
After making one I even remember the order.
Sew inseam, crotch, sides, then waist/hem.
The worst part is waist/hem, because it involves pressing. :p

I added buttonholes on the waistband and made it a drawstring pants.
Since I don't really know their true size, I figured I'll make the elastic very loose and add the drawstring so they have more control over the fit.

I also made pants for her 10 months-old daughter.
I used a pattern from Japanese book in 80cm.
I think it's so cute to be able to wear a matching clothes with your daughter!!

I'm planning to make one for my other sister-in-law and her daughter.
Same fabric, different color.
I found a flannel fabric in skull print, so I'm planning to make one for her husband/2 sons.

It's so easy & straight forward, that I can make one a day!

September 28, 2011

DC 4030 Review/Testing

Kids are asleep. My husband is at school.
I'm enjoying this "me time" to test out my new Janome DC 4030 sewing machine.
As I started to go through the manual, I'm just "woooooohooa."
So I figured I'll write some comments/impressions as I go through the manual.

1. It comes with a plastic cover! It looks so professional. :)
Weight isn't too bad. It's like my last Brother LS2125. (which I already sold it on craigslist, the first day I posted!)

2. Foot pedal. The cord retracts. How nice. :)

3. But more than the foot control... Woooow, the Start/Stop button!!!
I was intimidated by this function...
"what, it sews on it's own? That's just too scary. I'll just stick to my good o' foot control..."
But I just pushed it, and it's just COOL!!!
There's a speed control slider to set your desired speed (which is also cool).
Once the start button is pushed, it starts slowly then up to the speed you selected.
You push the button again, and it slows own then stops.
WHOA!
I'm still scared to use it, but If I have a loooong straight stitch to do (like the shirred dress), I'll definitely use this.
By the way, on the speed control slider, "slow" is reeeeally slow, and "fast" is scary fast.

4. Up/Down needle position.
Push the button, and the needle goes up or down. Cool.
****After actually sewing for a bit, I realized this is one of the best function for me. You don't need to crank the hand wheel just to get the needle out once you're done sewing... Seems like a small thing but makes a big difference!!!

5. Auto-lock button/Reverse stitch button
I still don't really know the difference...

6. Presser Foot Lifter
It goes up & down, and then a little (1/4") higher as well.

7. Thread cutter
I use scissors so I don't really care for it.

8. Extension Table
It detatches to show the free-arem and the table has accessory case.

9. Pressor Foot Pressure Adjusting Lever
Its inside the face cover - which just slides opens. It's so nice after having Brother LS2125, which I needed to screw open it every time. ...which caused me to clean/oil less often. (excuse)
The lever has 0-3 levels that can be easily changed.

10. Changing of the Pressor Foot
Push a button - foot drops. Put a foot under neath the holder. Lower the presser bar. Attached.
This is sooooo cool!!!!
I was always so frustrated with attaching a foot on my Brother LS2125... You had to hold the bar while matching the pin to the groove.

11. Winding the bobbin
I first had a trouble with it - It seemed to keep winding below the bobbin (annoying!) but I just had to make sure that the thread was firmly around the first thread guide.
It was going slow, and I realized I had the speed control lever on slow-medium. I put it on fast, and it was done fast. I've gotta remember to check the speed control lever.
Winding was also quiet!! :)

12. Setting the bobbin
Easy enough. The light is right on it, which helps. So this is what the top-loading bobbin is all about, huh??

13. Threading the machine
Pretty easy again. Similar to Brother LS2125.

14. Needle Threader
This is the function I was waiting for - My eyes are so bad, it always hurt my eyes to thread the needle.
First attempt... What the...?? Did I say my eyes are so bad?
Just by looking at the instruction on the illustration hurt my eyes.
It's too late today... I need to find this manual and enlarge this illustration to see it better next time. I just threaded through the needle hole.

15. Drawing the bobbin thread.
Push the needle up/down botton. Voila. The bobbin thread is up. Nice function!!! :)
No more cranking up the hand wheel to do this job!!
...Except the space between the foot/plate was too small, I needed to use my scissors to pick up the bobbin thread. Am I doing something wrong?

16. Auto-Thread tension Dial.
LOVE IT!

17. Start sewing.
....My thread jammed!!!! UGGGHHH!!! Already!?
The thread jammed in the bobbin holder. i had to open the needle plate to clear the thread out.
It's also because I used the start/stop button.
I couldn't react fast enough to prevent the thread from jamming until the machine stops. If I was using the foot control it would've been an instant stop.
See? I'm not ready for this start/stop button...

OK, I just realized I threaded the needle thread wrong... I just missed one thread guide. I actually had it in there, but when I was fussing with the auto-threader, it must've came off. Now it's sewing beautifully.

AWWWW I can't wait to actually start sewing!!!

September 27, 2011

DC 4030 Received

My new sewing machine is here!!! :)

...But I haven't been able to play with it. :(
Since it's brand new, I figured I should just use my old Brother (LS-2125) to finish the project that I'm working on, since it's almost done.
It ended up taking me longer than I expected, and it's already 10pm.
I figured I should get some rest.
There's always tomorrow...

Just by looking at the machine & manual, I'm a little intimidated.
I've never used computer sewing machine.
Just the fact it has start/stop button scares me. What, it sews on its own!?!?

One thing though, it's a little rocky.
I don't know if it's missing a foot (not the presser foot, the foot for the machine) or something, but it rocks.
I'm scared it'll be shakey when I actually sew.
I don't know if it's defective or all DC4030 is like that.
I really don't want to return it, it already cost me $50 s/h and I didn't really like the seller. :(

September 20, 2011

Self-Drafted Suede Bag Pattern (- to-be...)

Once again, I have a project in mind.

Although I ordered the given amount of fabrics, because I made the HotPatterns Hobo bag smaller, I have so much suede fabric left over.
Hobo bag was really cute, but I think it's more for the youngens... (therefore I'm making them for my teenage sister-in-laws and cousins)
I wanted to make something for the older generations, as this suede is really nice.
I looked around for good patterns... especially free ones... but nothing that caught my eyes.
So I decided, why don't I just come up with a pattern myself?
I've made enough bags, I think I can make something simple on my own.
So I first came up with a design that'll look nice with suede fabric.

And then I thought...
Well, if I'm coming up with it myself, why don't I sell the pattern on Etsy?
But if I do, I want the pattern to look professional for others to use.
...That means it needs to be computer-generated.
Hmm? Do I use Illustrator?
I have Photoshop and I'm pretty good at it...
Then I found this post on BurdaStyle how to make your pattern PDF.

I think I'm gonna use this tutorial to import my hand drawn pattern into Photoshop, then clean it up.
Hopefully I can do it...

Janome DC 4030

So, I got a call from the sewing machine vendor, and he told me that Janome TB30 is not available.
I kinda expected it, as I couldn't really find any online.
He offered me a "better" Janome machine for $499. AND he said the s/h should only be about $25.
He said it's DC 2011 - which isn't actually "better" to me...
It had more stitches, but I'm not interested in different stitches.
It doesn't have the presser foot adjuster, as it's probably more important for me when I sew knits.

I told him that I have another vendor who supposedly carries it, so I'm gonna call the other guy and call back.
He told me, "Hun, he won't have it. This machine has been discontinued for 2 years."

I called the other guy, and he didn't have it either.
But he offered me DC 4030 for $399, which is exactly the same as TB30 but the newer model.
It's actually the one I saw at the local store, so I told him I'll try to cancel the original seller and call him back.

I called the original vendor and told him what happened.
He said "I have DC4030... How much did the other guy quote you?"
I told him $399, +$50 s/h.
He said "We have it for $499. Ok, I'll give it to you for this price."

It sounds good when I just write it down, but I wasn't too happy with the experience.
First of all, why do all these vendors still have TB30 on sale, when they don't even have it?
And as for the first guy, they even charged my credit card when I first ordered, and then tried to sell me a different model.
And hey, whatever happened to $25 s/h talk??

The second vendor (I won't say who the first one was, but the second one was www.sewingmachinecabinets.com) was alot nicer, and I would've bought with them, but since the first guy already charged my CC, I didn't want to go through the refund process.
It might've taken alot more sales talk from the guy.
Since it was the same price & shipping, plus it's $300 cheaper than the local store, I decided to just go with him.

Anyways, I should be getting the DC4030 within 2 weeks.
Now I know how that machine runs, I don't fell like using the Brother to sew anymore...

September 19, 2011

New Sewing Machine...


My birthday is coming up.
Not that I don't like my sewing machine, but I decided I wanted to get a new sewing machine.
I had my machine for almost 10 years. It's been working great, but since I sew almost every night and learning more and more, I thought it would be nice to have a sewing machine with more functions.

So I researched, and my jaw dropped over how much functions newer sewing machines have.
Of course it costs more... When I got my Brother machine from Walmart, I wasn't planning to sew much so I got the cheapest thing available.

I decided on Janome Threadbanger TB30.
I liked all the features it has for the price...and of course the graphics on it!
I read that it actually didn't sell well, because of the graphics.
I'm assuming they targeted the younger crowd because of the threadbanger.com audience, but I think the people who could afford a nicer more expensive sewing machines are probably older and not much into the graphics.

Since it's been few years since this model came out, it's already been discontinued, and it's harder to find.
I found a couple of online vendors having this, and one of them was offering free shipping, I ordered it 2 days ago. (Saturday)
Today is Monday, and I got a call from them, telling me to call them back.
I'm assuming that they're gonna tell me that they don't have it anymore, or they're gonna charge me shipping because I'm in Hawaii. :(
I checked the other websites and they have it for the same price $399 + $50 shipping, so if the first vendor can give me this price I'd go with them.

It's still cheaper than DC4030, which is supposedly the same model except no graphics.
I went to the local sewing machine store (one of few in Hawaii) and he offered $699 for it. :(
I actually went there to see how it works, because I knew it was the same as TB30.

I just couldn't believe how smooth it looked...
He showed me the different stitches (which looked more even), how to use buttonhole foot (one step!), and automatic tension adjustment.. He sewed organza right after sewing a denim without touching anything, and the stitches held great.
It also had an overlock foot, that made it look like a serger.
Since I'm having a hard time adjusting my serger thread tension, this was so attractive.
I asked him if it could replace a serger - and he said no, because TB30 only works with midweight fabrics.
I was almost drooling over it...

I can't wait to get my hands on it!!!!
I really hope I get it... even if I have to pay shipping!

September 3, 2011

Shirred summer dress


We're going Wakiki for "staycation" this Labor's Day weekend.

I wanted a cute summer dress for this occasion.

One of the fabrics I bought from http://www.fabric.com/ was turquoise blue stripe knit.

I decided to make shirred summer dress, using Threadbanger blog.


Considering how cute it is, it's soooo easy.

It's basically a rectangular fabric with rows of stitches using the elastic thread in the bobbin.


I originally wanted to make a maxi dress.

I bought 1 1/2yd, and it would've been enough if I was to cut it along the salvage.

But I forgot that this is stripe, and I HAVE TO cut it against the salvage if I wanted the horizontal stripe.

It barely made it to knee length, so I used the extra material to make a gathered ruffle.


Ready for the beach! :)

August 31, 2011

Nomad Hobo Handbag

My next project is Nomad Hobo Handbag from http://www.fabric.com/.
I love http://www.fabric.com/ and Hot Patterns for posting free patterns!!

This is the start of my x'mas gift making.
I'm making this in greyish beige suade and paisley cotton lining.
Right off the bat, I made a mistake... or should I say I didn't pay attention.
They called for 3/4yd of lining.
I measured the pattern, and figured I only need 1/2yd, so that's what I ordered.
I was cutting it out, and realized that I needed 4 pieces of lining instead of 2 pieces that I thought.
I had to CUT at the seam allowances to make the pattern fit.
So the finished bag will be a little smaller.
Well, in another words, you CAN make it with 1/2yd of lining fabric as long as you don't mind it a little smaller!
Is glass half full, or half empty?

The thing I like about this bag is, that it doesn't need interfacing.
After making Amy Butler's Cosmo Bag and that it took forever to fuse the interfacing, I'm glad that I don't need to do this process.

I ironed the fabric and cut the pieces.
Then attached the magnetic snaps.
(By the way does anyone need a tutorial on attaching the magnetic snaps? Maybe next one...)

Ready to sew!

9/1/2011

Wow!
I can't believe how easy that bag was put together!
I finished it last night - after cutting the pieces, it only took me about 3hrs to sew it altogether.
Bring it on, X'mas!

Few comments...
The inside pockets are suggested to be sewn on the panels with the handles, but I prefer it on the side.

This is mentioned so many times on the reviews as well, but... especially after the size was reduced, it's just impossible to "put your hand up the handle, and pull the other handle in."
I actually did, using a tweezer.
After I pulled it all the way through, I realized I had to pull the outside handle in as well.
At this point it was 10:30pm and I was working on this for 3hrs...
So I didn't even try.
I just sewed the handles together from outside, with the seam shown.
If I could pull it off (literally, pull the handles off!), it would've been a really nice finish...
This bag wouldn't show ANY seams outside.
But it doens't look that bad.

I really love this bag!!!
I want one for myself, except suade is too hot-looking for Hawaii.
Plus I carry a huge diaper bag now days, and not these small purses anymore...
It's perfect for my young family members!

Pictures...
This is the handles attached, sewn outside.


Inside.


9/7/2011


I made another one.


I actually like this one better, using Kitty Yoshida's City Girl Oversized Paisley in pink. I luckily got this fabric on sale at http://www.fabric.com/ for $3.99/yd (about $2, since I only needed half yd).


When I received it in the mail I really loved it - I wish I ordered more, but it looks like they discontinued this. :(


They have it in darker pink, but it's not as cute. :(


This is how it looks like holding it.
I'm 4'11", so I think it's a little long on me, but for someone with average height, it's probably perfect. If I was to make it for myself I'll probably shorten the handles.

OK, a breakthrough.
I found a way to follow the instruction and put one handle through the other.
I used a good old safety pin.
I use this big safety pin as a tool to turn some straps for different projects.
So I pinned the right side of 2 handles, and put the safety pin inside one handle, and pulled the safety pin through the handle.
This method makes the finish clean without showing any seams, however it's a little hard to make sure that handles are attached straight together.
First of all I wasn't sure if the handles were twisted inside the other (it might have helped if I pressed the handles first), and when I sewed the handles and pull it back out, there was a big wrinkle in the middle. :(
So I had to do it over again...
But I pulled it through the wrong handle, and had to pull it back out the other handle... Just a hassle. :(
So this is how it ended up.
I'm not sure if I like this finish that much, compared to having the seam outside, which was so much easier.


August 29, 2011

Batwing shirt Tutorial


I finished my Amy Butler Cosmo Bag... washed all my fabrics and ready to sew!
On last batwing shirt blog page, I mentioned that I wanted to make a tutorial...
I do! I do!

Before I start, I apologize in advance if my spacing is a little off.
Everytime I edit the page, the program re-spaces on its own, and it's really annoying. I'm planning to fix it once I'm done with everything.
Also, I'll be updating as I progress the project.
I'm doing this while my kids are taking a nap, so bare with me if I take long to finish it!

I'm not sure if I can upload a pattern.
It's handwritten so I scanned and tried to make it nicer using photoshop.
But I'm not sure how the sizing will go.
First of all, I'm XS/S, and this is the size I made for this pattern.
If I was able to upload a pattern, I think you can just printed out in enlarged size for bigger sizes.
But rather than printing, enlarging, etc, I think it's easier if I just show what I did.

Here's what I did.
Pick your favorite shirt.


Fold it in half lengthwise, on the back side, and trace the neck/shoulder area (colored in red) on a paper. (I taped about 6 pieces of paper)
You can decide how long your sleeve wants to be...
But from the tip of your sleeve, make a semi-circle (Or should I say quarter-circle, since it's folded in half?) to the bottom of the shirt -or however the length you want- colored in purple.
Also draw a line where the side seam is (colored in light blue). This is where your side seam will be.

I didn't do this for myself (I noticed it after I started sewing), but please add any seam allowance.

Voila! That's it!!
I'll be cutting the fabric tomorrow...

>>>>>>>>>>>>>>>>>>>>>>>>>>>>>>>>>>>>>>>>&gt

8/20/2011


Here's my fabric.
First fold it in half, lengthwise. Then fold it in half again.
This way, you can cut front & back pieces at the same time.


Layer the pattern over the fabric, matching the folds, and cut your pieces.
This is how it should look like, 2 pieces.

We'll make one of the pieces a front piece, by lowering the neckline.I just guess-timate it, but you just cut a semi-circle from the edge of the original neckline, to the depth of neckline of your choice.
Don't cut too much, because when you use a bias finish, it'll be even more lower.
You'll also need a bias-tape.
I use the same fabric. I measure the neck line (length) and cut a strip in 4cm width.
You can use any width, I just like 4cm.
So for my shirt, my neckline is 64cm, so it'll be at least 64cm x 4cm strip.
I like to have extra, so I'll make 70cm x 4cm just in case.


OK! Ready to sew!!


>>>>>>>>>>>>>>>>>>>>>>>>>>


First, sew (in my case, I serged) one side of the shoulder seam.
After one shoulder seam is done, attach the bias tape to the neckline.

I'm not the best person to do the bias finish, but this is the method I learned from one of the sewist from www.sewing.patternreview.com website, and it's so much easier!!

First fold the tape in half, lengthwise, RIGHT side out.
Then attach this to the RIGHT side of the fabric.


Then sew the MIDDLE of the (folded) bias tape.

Half of the bias tape should be around 2cm (in my case), so there should be 1cm on each side of the seam. Cut about 0.5cm.


Fold up the bias, and press.


Now sew the other shoulder seam.


Now when you fold over the bias, raw edge is enclosed. Sew.


That was the hardest part of this project, and believe it or not you're almost done!
All you have to do left is to sew the hem, and side seams!

I used my serger to do a rolled hem on my shirt.
I used the good old fold twice & sew method (I'm not sure if there's a proper word to describe this?) on my last batwing shirt, but because it's a knit, it turned out too wavy.
This was my first rolled hem, and even though it could improve some more, I like the look of it. Plus it's only one-step! I love it!

Then you sew the side seams.
It's the line you drew on the pattern where the side seam on the normal shirt.
I'm not sure if you can see, but there's a seam line on my shirt.
You just have to try it out, but it worked the best for me when I sew up to the hip area.

TAH-DAH! YOU'RE DONE!
I'll be wearing this tomorrow and upload a picture. :)


August 26, 2011

Clinique Even Better Clinical Dark Spot Corrector


Few weeks ago I bought Clinique Even Better Clinical Dark Spot Corrector...
Actually the 3pc set from Sephora including Dark Spot Corrector, 7-day scrub and Dark Spot Corrector day moisturizer with SPF.

I've always had freckles since I was a kid.
After the pregnancies those freckles became bigger and darker, and more suited to be called "the dark spots."
So I always like to try something that correct the uneven skintones, or brightens, or whitens.
I wanted to try this product after seeing their commercial, and jumped on it when I saw the 3pc set that included everything I planned to buy separatedly.

Clinique Even Better Clinical Dark Spot Corrector...
The texture is a little thick, but turns skin very smooth after application.
It's not oily nor too dry.
Well, does it work??
Surprisingly, YESSSSS!!!!!
I've only used it maybe 3 weeks, but my spots are definitely lighter.
The smaller, lighter "freckles" are pretty much gone.
If I put foundation, you can't even see them anymore.

Considering the price, I'm happily surprised at this price.
I have used the Caudalie product that costs about $100/bottle, and it didn't give me this much result this fast.

I'm very happy with it... I'll keep buying this product!
Very much recommended!!


August 25, 2011

Amy Butler Cosmo Bag

Moving on to bag making.
I got Amy Butler's Style Stitches Book.
I like the Cosmo Bag, the first project on the book.
I need a new diaper bag, and this seems like a perfect bag.
....except it's a little too big, so I scanned the pattern and reduced it to ~90%.
After cutting the fabric, I think I got a good size.


I'm using Amy Butler's Midwest Modern Optic Blossom Linen for the lining, and grey solid cotton for the exterior, which I got from www.fabric.com about a week ago, and it should be on the way...
For recommended interfacing, I got Pellon SF-101 on ebay.
I got 10yd bolt for $29.99 (free shiping).
Considering it's about $5/yd at walmart, and I know I'll probably use 10yd for something, I thought it's a better deal.

Bags... it sounds simpler than garment making, but it really is not.
There're many pieces involved, and it takes time to fuse all the interfacing pieces.
Last night, I got to cut all the lining fabrics and got to fuse 1 piece of interfacing. Then at 10pm, both my kids woke up, and I had to put then back to sleep.
Aww, life of a mother.


>>>>>>>>>>>>>

Mmmmm, I'm a little disappointed.
I just got my fabrics from www.fabric.com.
I ordered grey kona cotton, called "snow".
...I thought it was grey when I saw it online. It actually came out to be grey-ish white!!
I don't mind using white for a bag, it'll probably look nice.
...It'll just get dirty fast!! I guess I can wash it...

On the same topic, they sent me a wrong fabric.
I got this paisley cotton to make another bag, and they sent me this bright yellow, kids monster print fabric. Hmm... totally different...

>>>>>>>>>>>>

8/26/2011
After comtemplating, I decided to use the print for exterior, and whits kona cotton for the handles.
I just couldn't do all-white bag, especially as a diaper bag.
This thing will be taken to the beach, park, etc, and it'll soon be grey bag.
(Hey, isn't that what I wanted? Ok, not this way)
I'm glad I had enough Amy Butler fabric.
I wanted to make a dress for my daughter with it, but oh well....

>>>>>>>>

It's 2am and I'm up.
Why? Because I passed out when I put the kids to sleep at 7:30pm, and woke up at 12:30am. That's already 5hrs of sleep. I couldn't go back to sleep right away, so I decided to sew.

PHEW!!
I finally fused all the interfacings, and am ready to sew!!!
Then I realized... Wow, the first sewing job on this project is a curve!!
Hmm, I haven't done curves in awhile...
It turned out ok though.


BUT. In the middle of top stitching, my needle broke. :(
Actually, it was bent.
It kept pulling up extra thread, and about 20min of "why!?!?!?" and trying to figure it out, I realized that the needle is bent.
I thought, "oh, ok, at least I bought some today at Walmart."
...wait. I remember putting them into the cart.
But I don't remember paying for it... or taking it out of the bag...
I checked the receipt, and I guessed right, I didn't buy them. :(
I must've left them in the cart. :(
So I had to stop sewing... oh well, I was getting sleepy anyways.

>>>>>>>>>>>
8/28/2011
Almost done with my Cosmo Bag.
It was fairly easy project. I think the worst part was cutting all the pieces and fusing the interfacing.
Once I started sewing, it only took 2-3hrs.

I made a small mistake...
Without paying attention to the directions, I just assumed that exterior bag and lining bag are identical.
So I made 4 front band pieces.
Once I got to the lining, I tried to attach the band, and realized it was too long.
??? Did I miss anything?
I figured I'll just cut and adjust, so I sewed it on, and clipped the v on the curve.
It still felt weird, so I looked at the pictures closely, and realized that the lining doesn't have the front band!!
It only has the handle pieces.
Luckily it didn't cause any damage.

I think the hardest part about this bag is to attach the exterior and lining together.
I've made bags before, so I knew what the instruction was talking about, but if this was to be your first bag project, it might be hard to understand.
So I took a picture of what happens when you "pull the lining through the hole".


After this, you put the lining into the exterior bag.
I'm not sure yet how to sew the bags together.
Am I supposed to press the edges in, and stitch them?

>>>>>>>>>>>

8/29/2011
ALL DONE!


I had the hardest time finishing it up, because my bobbin thread kept getting tangled. After few fights, it ran out of the bobbin thread, and once I changed it, it was fine.

REVIEW of this pattern...

Amy Butler Cosmo Bag from her book Style Stitches.

Did it look like the photo/drawing on the pattern envelope once you were done sewing with it? Yes

Were the instructions easy to follow?
Somewhat. I've made bags in the past, but I had to read each steps few times mostly because of many pattern pieces. I have to make sure that which one is "exterior", "lining", "lining pocket", etc.
On some occasions I wished there were more pictures.
Especially the end, where you attach the exterior and lining together. It's just a simple paragraph without any pictures. It might be hard to figure out if you've never made bags before.
I've taken a picture of this step on my blog, hopefully it might help some people who's attempting to make this...

The worst part about this bag was cutting the fabric & fusing the interfacing. It seemed to taken me forever - but once I started sewing, it probably only took 3-4hrs from there.


What did you particularly like or dislike about the pattern? I like the size of it, even though I reduced the pattern to around 80%. I also like the covered button on front. I think it makes a big difference on appearence

Fabric Used:Amy Buttler Optic Blossom Linen on exterior/lining, Snow Kona Cotton on handles

Pattern alterations or any design changes you made: This bag is huge!!! I scanned and reduced the pattern to about 80%. It's still quite big, and it's probably the right size for me, but I could've left it alone if I wanted a diaper bag.

Would you sew it again? Would you recommend it to others? I would like to sew this again over and over... the only thing is, it's not very cheap to make it, depending on what kind of fabric you use. Plus it uses so much interfacing!! It says over 6yd in the instruction. I got a 10yd bolt for $29.99, but if you were to buy it at Walmart for $5-6/yd, that's over $30 just on interfacing alone!

Conclusion: Overall I really like this bag. I like the style so much, I would like to make more - I also want to make some for x'mas gifts. But because of the cost of material, I probably won't make it as much. :(
August 22, 2011

Self drafted pattern - batwing shirt

I'm attempting to draft a pattern...

It seems like the trend is the batwing sleeves. They're everywhere!
I found this shirt at Target.
It's so cute, but when I see it, it seems like such a simple pattern!!
Two pieces - back & front, semi-circle (although the shoulder is a little slanted), with a little seam around the waist.

I used one of the t-shirt as a template. Then from the shoulder, I made the sleeves in semi-circle... I drafted the side seam, but I think I'll just need to wing it after I sew the pieces together.


This is just the back piece... I'll cut 2 pieces like this, and will cut the neck lower.


This is the front piece. I cut the neck a little lower than the back.
I matched it on my shoulder, and it seems like the result will be what I'm looking for. :)
I can't wait to start sewing this!
If I am successfully able to make this, I'll upload the pattern & tutorial. It's simple enough. :)
There're so many free patterns/tutorials on the net that have helped me.
I hope I can return the favor. :)

I just ordered a whole bunch of knit fabric from http://www.fabric.com/. They were having a massive knit sale, that alot of them were $2.50-$2.99/yd. I was gonna make another peachy-beachy cover up, try their new fringe tie shirt, another maxi-length dress and maybe this batwing shirt. Hopefully it turns out well! :)


It's a deal compared to $25 Target shirt!

Is it just me... or is it more fun picking the fabrics and debating what to make with them, compared to actual making process...
Now I've ordered the fabrics, I feel like the fun is done. :p

8/24/2011

So, here's the finished product.
After sewing the neck binding, I thought it was too long overall, so I cut the sleeve/hem length by about 1in.
I think I should've left it the way it was...
After hemming the edges it got so much shorter.
I'm pretty happy with the sleeve length, but I should've kept the hem.

Also, I think this pattern should be made in patterned fabric.
When it's solid, it looks like I'm just wearing a poncho!
I had to add a necklace in order to make it a little interesting.
I would probably finish edges with rolled hem next time...
Whenever I serge & straight stitch, it always ends up wavy. :(
It'll probably look more neater in rolled hem.

Hopefully I can make a tutorial next time I make this.
I'm just waiting for more fabric to arrive...


August 21, 2011

v1152 dress - pretty much done

Here's the "almost finished" v1152 dress.
It's almost finished, because I still need to hem the bottom but broke my needle on my serger and can't continue. :(

So here's my review which I'll post on www.sewing.patternsreview.com as well, but since I write too much, I'll write a long version on this blog.

First of all I just LOVE LOVE LOVE this dress.
I just love everything about it. How girly it looks, small details, and the best of all I love this puffed sleeves.
When you think of puffed sleeves, you'd think of "princess" - but this is a little slouchy that it makes it look more modern and not as fairytale-ish.
I really want to use this sleeves on some other patterns, like a simple t-shirt with maybe few gatherings around the neck.

I had the love & hate relationship (?) with all the small details.
I didn't do this when I made the muslin, so I didn't realize how time consuming it was, although the instruction is very straight forward.

For example, alot of seams are covered - the back of the front piping details is covered with a facing.
Shoulders also has a facing.
I think the only visible seems were the sides & armholes.
I used a serger for these areas.
All these facings made the dress look very neat, but it needed alot of hand slipstitchig which was time consuming.

The front band - piping (oh, the piping...) and gathers...
This is the detail that makes this dress pretty, but it really shows your sewing skills...
My piping job was so uneven and wavy, I don't think I can wear this outside the house. :(

I will try this again though, with a different fabric.
Matte jersey or silk de chine was suggested but I used regular knit jersey.
I thought it would be cooler than matte jersey, and certainly cheaper than silk.
But it was such a bad selection. It just doesn't look right. It needs a little weight or stiffness.
I want to try using silk de chine as suggested.
I already made this twice, so I shouldn't mess up too much.
I want to make it for my daughter's first birthday party in December.

August 10, 2011

Amy Butler craze

Ok, I'm not even done with my Rebecca Taylor dress...
(In fact, I'm in the middle of cutting the pieces. I haven't even started sewing.)
But I want to start sewing a bag.

I hate to jump on the band wagon, but I decided to jump on the Amy Butler wagon.
I borrowed one of her books from the library, and since it was missing the pattern, I bought one online.

By the way, I got this book from www.bookdepository.com.
Appearently it's a British company, but they offered free shipping everywhere in the world, and prices were cheaper itself.
This book was about $30, but I got it for $18.99 on this site.
The shipping was pretty fast too. They claimed 7-14 business days, and I got it maybe in about a week and a half.

Anyhoo.
I want to make the Cosmo bag, that's on the front cover of the book...
but this thing just looks HUGE!!!
Since I'm small, it'll probably be like 2/3 of me. Haha
I'm thinking about make a copy of the pattern in the reduced size, but I wonder if it'll work?
The size of the handles seem fine. Would that look funny?

http://www.amazon.com/Amy-Butlers-Style-Stitches-Wonderful/dp/0811866696

July 30, 2011

John Frieda Precision Foam Colour

I've finally made my hair-color match.

It all started when I last went to a haircut...
My usual stylist was busy, so I had a substitute.
They are both good, so I didn't mind.
The stylist shyly asked me, "Uhhh.... Do you only color your surface?"
What???
"No... Maybe I don't color as good? Haha"
She mentioned that my top layer is brown, but my bottom layer is black, so my hair is two-toned.
She said it's normal when you color at home, because it's hard to do by yourself.
She doesn't push me to get a salon-color every time, because it can get costly, but she did recommend get it done every once in awhile just to get a even color.
Since then, I was so paranoid over my hair color...

I'm entering the "mid-30" bracket, and ever since I got married around 28, I started having grey hair, especially around my faceline. :(
I think the stress of wedding-planning started it all. :p

Anyways, so I almost thought about getting the color done at the salon.
...But once again decided not to, after finding out it'll be over $100 with the haircut.
I decided I'll try coloring it more carefully first before I go to the salon route.
I do admit that I'm more careful coloring the greys around the faceline, but I didn't really care about the rest.
I normally put the color around the faceline, and just comb that to the hair tip.

I was at Walmart and found John Frieda's Precision Foam Colour.
It was about $13.
It's a little pricier than the other brands which are around $8...
but once I used it, I can't go back to any other brands anymore.

First of all, it's SO easy to use.
You mix the two solutions, invert it 5x, and you're ready to go.
Just push the bottle to get the foam, and put it on your hair, and massage it like a shampoo.
After 30min (normally 2omin but longer if you have greys), you just wash it off.
It also comes with a conditioner, that you can use once a week for about a month.

Because it's a foam, it goes so evenly.
This was the first time I got to color so even.
The conditioner makes the hair so soft too.
Then it has a certain glossy-shine that I like.

I just found out there's a $1 off coupon on their website!

July 25, 2011

Today's amazing finding

I'm almost done with my muslin Vogue 1152 dress.
Once it's done, I wanted to make it in a jersey knit.
It's not listed in the recommended fabric (although matte jersey is), but I wanted something light for the hot Hawaii weather, and also because the dress is pretty voluminous that I wanted to use some slinky material.


I was planning to order it from www.fabric .com for about $9/yd.
Then I found this at target...


Jersey knit King size sheet set on clearance for $7!!! I don't know why, but this was the ONLY one on clearance. No other color or sizes.


It includes a flat sheet of 108in x 106in (what's that... about 3yds x 3yds??), fitted sheet of 78in x 81 in, and 2 pillow cases of 21in x 41in.


I'll have enough fabric for awhile... I can make my dress, a summer top, few dresses for my daughter, maybe even a pajama for my son.


Whoohoo!


The only thing is, material seems too thin...


For my Vogue 1152, the top is ok since I'm planning to wear a camisole underneath anyways, but I'll have to either wear a peticoat (?), or make an under-skirt with the same material, or make a liner... but hey, for $7 I don't mind the extra work.