Here's the tutorial. ...More like a report on what I did, but hopefully someone can follow!
First, get the materials ready.
This is the placemat to be used...

Prepare the inside fabric. The placemat is 15(w) x 11(L) inches.
After making the pleats on the placemat, the dimention became 12(w) x 11(L) inches, so I cut the sides off to match the shape. (Measured 6 inches from the top center to the right & left, and drew a diagnal line to the bottom corners)

When I layer the outer fabric (Placemat) after the pleats were made, there's a little curve... I traced and cut it off the inner material, so it matches the shape.
The next step gives a depth to the bottom of the purse. This is hard to explain, but hope you get it from the picture.
Fold the bottom edges into a triangle. Mark 1 inch to the both sides from the center line. Stitch this line.
Leave about 1/3 inch from the stitch, and cut the edge off. Do the same for both bottom corners, on both inner and outer fabric.
Prepare the ribbon (? what do you call this?) to hold the handles. Cut 2 x 10 inches material.

Press, and cut it in 4 pieces.
About 2 inches from the edge of outer fabric, fold the ribbon in half and pin them on.
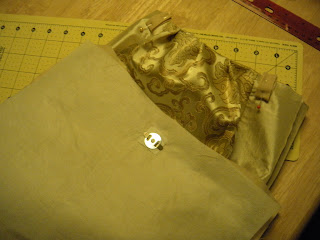
Assemble the outer and inner fabric together. Put the outer fabric (placemats) in the inner fabric, right sides together.
Stitch the top of the layers together.
From the hole made on inner material, pull the outer material out.
Completely out.
Close the hole.
Put the inner material nicely into the outer purse, and top stitch the top edge.
Attach handles...
And VOILA!! The placemat purse is done!!!
Doesn't even look like it's made of placemats, huh? :)
*You're welcome to use this tutorial - but please limit to personal use only.


No comments:
Post a Comment